Transforming a Photo into a Caricature Using Photoshop’s Liquify Feature
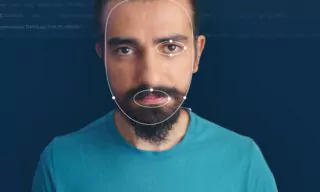
Creating a caricature from a photograph is a fun and creative process that can be easily achieved with Photoshop, particularly by utilizing its Liquify feature. This tutorial will guide you through the steps of transforming a standard photo into a caricature, emphasizing the importance of exaggeration and manipulation of facial features to achieve a cartoonish effect.
- Preparing Your Image for Editing
- Choosing and Isolating Your Subject
- Duplicating and Adjusting the Selected Area
The Basics of Caricature Creation
What is a Caricature?
A caricature is an artistic representation where certain features of the subject are exaggerated or simplified. The goal is to create a humorous or grotesque effect while still maintaining a recognizable likeness to the original subject.
Key Elements in Caricature Making
When creating a caricature, certain aspects are typically exaggerated:
- This draws attention to these expressive features.
- Making these features smaller or larger can add a humorous effect.
- Adjustments like lengthening the chin or widening the forehead can enhance the caricature effect.
- Often, the face is made larger in proportion to the body for a more dramatic effect.
Preparing Your Image for Editing
Choosing and Isolating Your Subject
- You can use your own photo, someone else’s, or any image you find online. For this tutorial, I’m using a specific photo, accessible via the link provided below.
- Using Photoshop’s Quick Selection Tool, separate the subject from the background. This can be done quickly by selecting the tool in the toolbox and making a selection around the subject, avoiding the background. For more intricate selections, the Pen Tool can be utilized.
Duplicating and Adjusting the Selected Area
- After making the selection, press Ctrl+J to duplicate the selected area. This step is crucial if the image or subject is not ideally positioned.
- Use the Lasso Tool, cut out the head (Ctrl+X), and then paste it back in the same position (Ctrl+Shift+V).
Transforming Your Image into a Smart Object
Why Convert to Smart Object?
Converting your layers to Smart Objects is beneficial as it preserves the original quality and allows for non-destructive editing. This means any filters or adjustments applied can be modified or removed later without permanently altering the original layer.
How to Convert to Smart Object?
Right-click on the layer and choose “Convert to Smart Object.” Repeat this process for each layer you wish to convert.
Using the Liquify Tool for Caricature Effects
Accessing Liquify
With your head layer selected, navigate to the Filter menu and select Liquify. This tool is instrumental in creating cartoon-like effects by allowing for the manipulation of facial features.
Manipulating Facial Features
Within the Liquify window, you have tools to enlarge, reduce, or shift features on the face. For caricatures, focus on:
- Enlarging the Eyes and Mouth: To emphasize expressiveness.
- Reducing the Size of the Nose: For a humorous effect.
- Adjusting the Forehead and Chin: Enlarge these to exaggerate the caricature.
Remember, the goal is to create a fun, exaggerated version of the original photo, so feel free to experiment with different adjustments until you achieve a look that appeals to you.
Finalizing the Caricature
Adding Shadows and Adjustments
After manipulating the features, you might need to add shadows or make further adjustments for a more cohesive look. Use the Brush Tool for masking and apply shading where necessary. Adjustment layers like Brightness/Contrast can also be used to enhance the final image.
The Flexibility of Smart Objects
One of the advantages of using Smart Objects is the ability to go back and edit the Liquify adjustments at any point. This flexibility allows for continuous refinement of your caricature.
Conclusion
In this tutorial, we explored how to use Photoshop’s Liquify feature to turn a photo into a caricature. Remember, the key to a successful caricature is in the exaggeration and playfulness of the features.


