Change Face Expressions via Smart Portrait in Photoshop
The realm of image processing has witnessed a remarkable transformation, thanks largely to the advancements in artificial intelligence (AI). One of the most groundbreaking developments in this field is the integration of AI into tools like Adobe Photoshop, particularly with the Neural Filters feature. This article delves into the capabilities of these neural filters, focusing on how they can alter facial expressions and much more.
Understanding Neural Filters in Photoshop
Neural Filters in Photoshop represent a significant leap in image editing technology. These filters leverage AI to apply complex transformations and effects to photos with just a few clicks.
Adobe has integrated these filters seamlessly into Photoshop (version 22 or later), making them accessible to a broad range of users, from professional photographers to hobbyists.
To use Neural Filters, you must have Photoshop version 22 installed. Once you open Photoshop, you can access these filters by selecting the ‘Neural Filters’ option under the ‘Filter’ menu. This action opens a dedicated panel where you can choose from various AI-powered options.
Manipulating Facial Expressions with AI
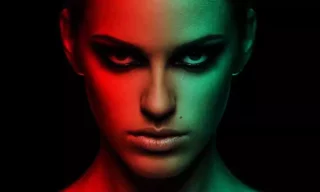
The Smart Portrait Feature
One of the most intriguing aspects of Neural Filters is the ‘Smart Portrait’ feature. This tool uses AI to recognize and modify facial expressions in a photograph. With sliders for happiness, surprise, and anger, users can adjust these emotions on a subject’s face with unprecedented ease and realism.
Experimenting with Emotions
The Smart Portrait feature allows for nuanced adjustments. Sliding the ‘Be Happy’ control, for instance, can turn a neutral expression into a smile. Similarly, adjusting the ‘Surprise’ and ‘Anger’ sliders can evoke corresponding expressions, showcasing the filter’s sensitivity to subtle facial changes.
Beyond Expressions: Age, Gaze, and More
AI in Photoshop goes beyond facial expressions. The ‘Facial Age’ slider, for example, can make a face look younger or older, demonstrating AI’s capability to understand and manipulate human aging.
Other notable features include adjusting the gaze direction and hair thickness. These tools add further depth to portrait editing, allowing for comprehensive modifications that were once time-consuming and challenging.
Altering the head direction and the source of lighting are other advanced features. These adjustments can significantly change the mood and composition of a photo, demonstrating the powerful impact of AI in image processing.
After making desired changes, users can save the edited facial features as a new layer in Photoshop. This feature provides flexibility, allowing users to toggle between the original and edited versions seamlessly.
Conclusion
The integration of AI in image processing, particularly through Photoshop’s Neural Filters, has opened up new horizons in digital art and photography. These tools not only simplify complex editing tasks but also empower users to push the boundaries of creativity. As AI continues to evolve, we can expect even more innovative and intuitive image editing capabilities in the future.