Creating An Eye-Catching Profile Image Using Photoshop
If you’re tired of the same old profile pictures and are seeking a fresh, creative look, this tutorial is for you. I’ll guide you through a simple yet effective method to transform an ordinary photo into a striking profile image using Adobe Photoshop. This process will involve basic Photoshop skills like layer manipulation, transformation, selection tools, and masking.
Preparing the Image
The first step in editing any image in Photoshop is to ensure that the layer is unlocked. In your layers panel, you will find a lock icon beside your image layer. Clicking on this lock will unlock the layer, allowing you to modify the image freely.
In this case, we want our image to face right instead of left. To achieve this, press Ctrl T (short for Transform), right-click on the image, and choose ‘Flip Horizontal’. This will mirror your image to the right orientation. Confirm the transformation by pressing ‘Enter’.
Separating the Main Object Using the Quick Selection Tool
The next step is to separate the main object (e.g., a person) from the background. If you’re using the latest version of Photoshop, you can use the ‘Object Selection Tool’ found in the toolbox.
This tool allows you to draw a rectangle around the object, and Photoshop intelligently selects it. For those using older versions, you might need to manually trace around the object with the ‘Pen Tool’.
Refining the Selection
After the initial selection, you might notice areas that are incorrectly included or excluded. Use the ‘Shift’ key (to add) and the ‘Alt’ key (to subtract) while using the selection tool to refine your selection. This step ensures that all necessary parts of the object are included, and unwanted areas are excluded.
Creating a Mask
Once satisfied with the selection, click on the ‘Select and Mask’ button. In the output settings, choose ‘New Layer with Layer Mask‘. This creates a new layer, isolating the selected object with a mask, effectively separating it from the background.
Adding a Background Circle
To add depth and focus to your profile image, draw a circle in the background using the ‘Ellipse Tool’. Hold ‘Shift’ while drawing to create a perfect circle. Center this circle in your workspace using the ‘Align’ tools.
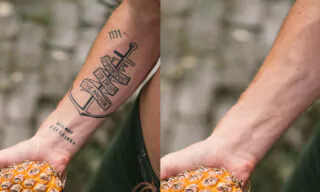
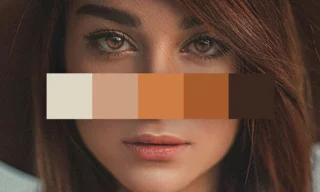
Coloring and Positioning
Decide on the color palette for your image; let’s say shades of yellow. Ensure the newly created ellipse is behind the main object layer. You may need to resize or reposition the main object to achieve the desired look, ensuring part of it overlaps the circle for a dynamic effect.
Grouping and Masking
Group the main object layer and the circle using Ctrl G. With the ellipse’s boundaries selected, use the ‘Brush Tool’ (shortcut ‘B’) to paint over areas outside the main object, applying the inverse selection if needed. This step helps in blending the object seamlessly with the background.
Conclusion
You now have a customized profile photo with a professional and artistic look. Feel free to experiment with different background colors or add additional elements like outlines. This process not only enhances a photo but also adds a unique touch to your profile image.