How to Create and Render Materials like Gold Silver Copper Bronze Material in Blender
In the mesmerizing world of 3D rendering, the pursuit of realism remains a thrilling yet complex challenge, especially when it comes to replicating the allure and sheen of metals like gold, silver, copper, and bronze in Blender.
Have you ever gazed upon a digital creation and wondered how such astonishing realism in metallic textures is achieved?
This blog post is poised to unravel the secrets behind rendering these captivating materials. From the nuances of ambient lighting to the specific hex codes for gold, every step is a crucial piece in the puzzle of digital realism.
Creating Realistic Materials in Blender
Creating realistic materials in Blender, especially metals like gold, silver, copper, and bronze, is a fascinating and intricate process. This blog post will delve into the specifics of achieving such realism, guided by the principles outlined in a video tutorial. We’ll explore each step, enriched with examples, statistics, and related stories to enhance understanding.
How to Create Gold Material?
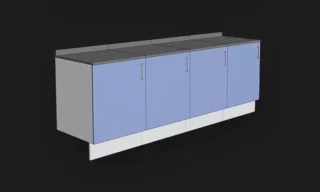
To begin, let’s focus on gold. A gold bar model is added to a scene in Blender. The initial step is to apply a subdivision surface modifier. This technique smooths out the object, making it more suitable for representing the shiny, smooth surface of gold.
Switching from wireframe to solid mode, we then proceed to create a new material named ‘gold’. The color is critical; a golden hex code (FFC125) is entered to get the precise shade of gold. This step is crucial as the base color sets the foundation for the material’s appearance.

Realism in rendering is greatly influenced by lighting. HDR (High Dynamic Range) images are recommended for ambient lighting, which significantly impacts the material’s appearance. Blender comes with default HDR images, but for more control and realism, custom HDR images can be added.
Silver, Copper, and Bronze
- Silver Material: For silver, we follow a similar process. After hiding the gold object, copy it and rename the material to ‘silver’, using the hex code C0C0C0. This color will give the material a realistic silver appearance.
- Copper Material: Next is copper. Copy the silver material, rename it to copper, and change the hex code to B87333. This color shift dramatically changes the material’s appearance, reflecting copper’s distinct hue.
- Bronze Material: Finally, for bronze, copy the material again, rename it to bronze, and use the hex code CD7F32. This gives the object the characteristic color of bronze.
How to Add HDR Images in Blender?
Adding an HDR (High Dynamic Range) image in Blender for realistic lighting is a straightforward process. HDR images provide a wide range of light intensities, from the very bright to the very dark, making them ideal for simulating real-world lighting in 3D scenes. Here’s how you can add an HDR image in Blender:
- Open Blender and Set Up Your Scene: First, launch Blender and open your project or create a new scene.
- Switch to the Shading Workspace: At the top of the Blender interface, you’ll find different workspace tabs. Click on the “Shading” tab. This workspace is optimized for creating and editing materials and lights.
- Go to World Settings: In the Shading workspace, you’ll see two main editors: the Node Editor and the 3D Viewport. In the Node Editor, make sure you are in the “World” context, not the “Object” context. You can switch to the World context by clicking on the small world icon.
- Add the Environment Texture Node: In the Node Editor, add an “Environment Texture” node. You can do this by pressing Shift + A to open the Add menu, then navigate to “Texture” and select “Environment Texture.”
- Load Your HDR Image: With the Environment Texture node selected, click on “Open” to browse your computer for the HDR image file. Select the HDR image you want to use and load it.
- Connect the Node to the Background: Connect the color output of the Environment Texture node to the color input of the “Background” node. The Background node is usually already connected to the “World Output” node by default.
Additional Techniques for Realism
Reflections and Roughness
Reflections play a significant role in the realism of metallic objects. Enabling screen space reflections in the render properties is crucial. Adjusting roughness values (suggested at 0.2 for gold) also contributes to how light interacts with the material’s surface, affecting its sheen and realism.
Rendering Engines and Bloom Effects
Blender offers different rendering engines, like Eevee and Cycles, each providing unique results. For a glowing effect, especially for metals like gold, the Bloom option in Eevee can be beneficial. This adds a soft light halo around bright areas, enhancing the metallic effect.
Conclusion
The process of creating these metallic materials in Blender demonstrates the intricate balance between color selection, lighting, and rendering techniques. As with any skill, practice and experimentation are key to mastering these techniques.