How to Create Realistic Stack of Banknotes in Blender for Beginners
|
Creating a realistic and impressive stack of banknotes in Blender is a valuable skill, especially if you’re interested in stock photography or digital art. In this detailed tutorial, we’ll walk you through the process, step by step.
Index
- Displaying Different Materials on Each Side of the Plane
- Create a Two-Sided Banknote
- Correcting Image Orientation
Setting Up the Workspace
Open Workspace and Clear Scene
- Open Blender and start with a new scene.
- Select each object, press the X key, and choose ‘delete’.
- You can add custom lighting later as needed.
Adding and Scaling a Plane for Banknote
Create the Banknote Base
- Press Shift + A, select ‘Plane’ under ‘Mesh’.
- Banknotes typically have a rectangular shape. For our example, set scale X to 7 and scale Y to 3. This can be adjusted in the ‘Object Properties’ if the size doesn’t match your specific banknote.
Transferring and Adjusting Pre-prepared Banknote Images
Apply Banknote Textures
- To view added banknotes in the scene.
- In the ‘Material Properties’ tab, create a new material.
- Use the ‘Base Color’ yellow icon to select ‘Image Texture’. Open and apply the front image of your banknote.
Adjusting the Texture
- Modify scale values in ‘Object Properties’ for a more accurate representation.
Displaying Different Materials on Each Side of the Plane
Create a Two-Sided Banknote
- Open it from the top left options.
- Use Shift + D to duplicate the front jpeg node, then add the back image.
- Connect both textures and use the ‘Geometry Node’ to differentiate front and back using the ‘Backfacing’ option.
Correcting Image Orientation
- Correct any reversed textures by editing the image outside Blender and reapplying it.
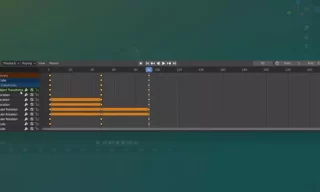
Adding Banknotes in Stacks Using Modifiers
Create a Stack of Banknotes
- Apply an ‘Array’ modifier to replicate the banknote.
- Set count (e.g., 100 for a stack) and adjust the Z-axis offset for realism.
Creating Realistic Stacks by Adjusting Position and Rotation
Enhance Realism with Small Adjustments
- Opt for a more detailed approach.
- Create a mesh line and adjust count and offset for overlapping banknotes.
Detailed Modifications
- Create a realistic effect with overlapping and varied positions.
- Use random values for position and rotation to make each banknote look unique.
Enhancing Realism with Random Placements and Light Settings
Final Touches for Realism
- Fine-tune placement and rotation for a natural look.
- Proper lighting and shadows will bring your stack of banknotes to life.
Conclusion
This tutorial demonstrates how to model a realistic stack of banknotes in Blender. By following these steps, you can create highly detailed and authentic-looking banknote stacks suitable for stock photography or digital art projects.
Trending


Look at These!