How to Setup HDRI Environment Background for Realistic Lighting
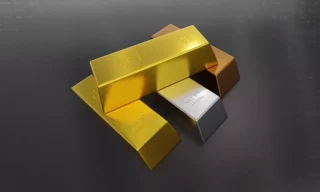
High Dynamic Range (HDR) images are a pivotal tool in creating lifelike lighting and realistic results in 3D scenes, particularly when using Blender. These images, often captured with 360-degree panoramic photography, offer a naturalistic quality to various 3D projects. This is especially relevant when dealing with reflective and complex materials such as glass, gold, silver, metal, and vehicles.
The Impact of HDR on Materials
When assigning materials like glass to objects in a scene, the influence of HDR becomes more pronounced. Upon switching to render mode, the initial darkness of objects is noticeable.
This can be altered by manipulating the Scene World settings in Blender, which allows for the temporary display of a default HDRI (High Dynamic Range Imaging), providing a preview of environmental impact without being present in the final render.
Material Properties and HDR Interaction
Adjusting material properties, like lowering the Roughness value on glass, can significantly change how the environment is reflected and absorbed, enhancing the realism of the scene.
Sourcing High-Quality HDR Images
Numerous online resources, such as Polyhaven.com, offer free, high-quality HDR images. These platforms categorize images based on the environment, complete with previews demonstrating how they influence a scene’s lighting.
Implementation of HDR Images
To implement an HDR image in Blender:
- Adding HDR Images: Navigate to the World icon in Blender, select the Environment Texture option, and choose your desired HDR image from either downloaded sources or Blender’s in-built library.
- Viewing HDR in the Viewport and Render: Once added, these HDR images provide a 360-degree background view in both the viewport and the final render.
Customizing Render Settings
Hiding HDR Images in Renders
For scenes where the HDR background isn’t desired in the final render: Access the Render Properties panel, enable the Transparent option under the Film settings. This retains the environmental impact of the HDR on objects without displaying the HDR background.
Adding Background Color
To incorporate a different background color while maintaining HDR effects: Utilize the Shader Editor to modify the World settings, blending the HDR impact with a chosen background color.
Conclusion
HDR images are a fundamental aspect of creating realistic and visually appealing 3D scenes in Blender. This tutorial covered the basics of sourcing and implementing HDR images, adjusting material properties, customizing render settings, and utilizing the Shader Editor for background modifications.