Blender’s Cell Fracture Add-on: Create Realistic Destruction Animations
Blender, an incredibly versatile 3D modeling and animation software, offers a myriad of tools and add-ons to enhance your 3D creation experience.
One such tool is the Cell Fracture add-on, which significantly broadens the possibilities in creating realistic animations and visualizations, especially in scenes depicting destruction or natural patterns.
This guide will dive into the intricacies of the Cell Fracture add-on, detailing its setup, usage, and application in creating dynamic simulations and static visualizations.
What is Cell Fracture?
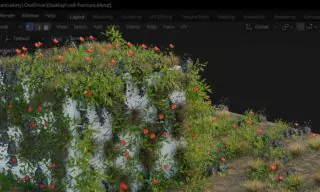
Cell Fracture is an add-on for Blender that allows users to fracture objects or create patterns reminiscent of natural stone walls. This tool is particularly useful in animations that involve explosions, impacts, or general destruction.
It works by analyzing the geometry of an object and fracturing it according to parameters set by the user. The result is an effective and realistic portrayal of broken or fragmented objects, which can be pivotal in both dynamic simulations and static visualizations.
Activating Cell Fracture
- Open Blender and click on ‘Edit’ from the top menu.
- In the dropdown menu, navigate to ‘Preferences’.
- Inside the Preferences window, find and select ‘Add-ons’ from the list of categories on the left side.
- In the Add-ons section, use the search box located at the top right corner and type “Cell Fracture”.
- From the search results, locate the Cell Fracture add-on and click on the checkbox next to it to enable the add-on for use in your Blender projects.
Using Cell Fracture
Creating Your First Fracture
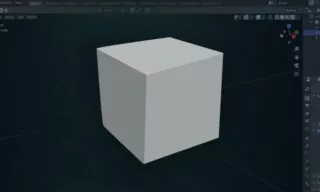
Let’s begin with a default cube, which Blender adds to every new project. Place the cube over the grid and adjust its size as needed. To apply Cell Fracture, with the object selected, go to ‘Object’ in the menu and select the ‘Cell Fracture’ option under ‘Quick Effects’.
This brings up a window with numerous settings, allowing for customization of the fracture effect. The default settings usually suffice, but for more intricate fractures, adjustments like source limit, noise, or other settings can be made.
Enhancing the Fracture
For a more detailed fracture, increase the geometry of the cube in Edit mode using the subdivide function. More surfaces on the object equate to more pieces in the fracture.
Utilize the knife tool (CTRL+R) to add more segments to the cube, both horizontally and vertically. Subdivide these further if needed. Switch back to Object mode, reapply the Cell Fracture, and observe the more complex fracture pattern achieved due to the increased geometry.
Simulating Realism
Rigid Body Dynamics
To bring the fractured object to life, apply rigid body physics. In Blender, this involves designating objects as ‘Active’ or ‘Passive’.
Active objects are influenced by physical simulations (like falling or colliding), while passive objects remain stationary, serving as surfaces for active objects to interact with.
In our example, make the fractured cube an active object and create a plane to act as the passive object. Assign rigid body roles accordingly, and upon playing the animation, observe how the fractured pieces interact with the plane, showcasing the detailed fragmentation effect.
Fine-Tuning the Simulation
The direction and behavior of the fragmented pieces can be modified for different effects. Experiment with pausing, restarting, and adjusting settings to observe various fragmentation behaviors. This flexibility allows for a wide range of creative possibilities in animation and visualization.
Conclusion
Today’s guide has taken you through the steps of installing and using the Cell Fracture add-on in Blender. We’ve covered the initial setup, how to fracture an object, and how to apply rigid body physics to simulate realistic movement and interaction of the fragmented pieces.
This add-on is a powerful tool for adding realism and dynamism to your 3D scenes, especially in animations involving destruction or natural patterns.
