Glow Effect in Blender: A Step-by-Step Guide to Enhancing Visual Realism
Blender, a powerful open-source 3D creation suite, offers a plethora of features for creating stunning visual effects. One such effect is the glow effect, commonly used to enhance the appearance of objects like lightsabers or other valuable items. In this detailed guide, we’ll walk through the process of adding a glow effect to objects in Blender.
Understanding the Basics of Glow Effects in Blender
Why Use Glow Effects?
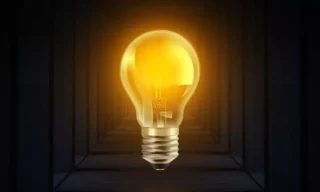
Glow effects, also known as bloom effects, can significantly enhance the visual appeal of an object in a 3D scene. They are especially effective in creating a sense of light or radiance emanating from an object, which can be critical for items like lightsabers, gems, or other luminous objects.
Step-by-Step Guide to Adding Glow Effects
Preparing Your Scene
- Start with an Object: For demonstration purposes, we’ll use a cube, which is the default object in Blender. However, remember that the glow effect can be applied to any object in your scene.
- Change the Background Color: Navigate to ‘World Properties’ and set the background color to black. A darker environment helps in accentuating the glow effect, making it more prominent.
- Material Properties: Go to ‘Material Properties’ and add a new material to your object.
- Emission Settings: Under ‘Surface’ options, select ‘Emission’. Adjust the emission strength; a value of around 3 is a good starting point. This step increases the luminosity of your object.
- Color Selection: Choose the color you want your object to emit. This color will define the hue of the glow effect.
- Render Properties: Click on ‘Render Properties’ and enable the ‘Bloom’ option. This is where the magic happens, and your object starts to exhibit a glow effect.
- Adjusting Bloom Settings: In the ‘Bloom’ settings, you’ll see an ‘Intensity’ parameter, usually set at 0.050. Increasing this value enhances the glow effect, allowing you to customize it according to the needs of your project.
Seeing the Glow in Action
- Once you have set up the glow effect, you can rotate and move around your scene. The glow effect will be consistently visible, adding a dynamic and visually appealing element to your object.
Practical Uses of Glow Effects
- Lightsabers and Fantasy Objects: This effect is particularly useful for objects like lightsabers in sci-fi projects or any other glowing fantasy elements.
- Enhancing Realism: Glow effects can also be used to simulate real-world phenomena like neon lights or glowing signs.
- Experimentation is Key: Feel free to experiment with different settings and objects. Each project may require unique adjustments to achieve the perfect glow.
- Community and Resources: Blender’s vast community offers numerous resources and tutorials for further exploration.
Conclusion
Creating a glow effect in Blender is a straightforward yet powerful technique to enhance your 3D projects. With these steps, you’re well on your way to adding a professional touch to your renders.