How to Model a Soccer Ball in Blender Easily
Blender, a versatile and powerful 3D modeling software, offers an array of features that can be used to create realistic models, including sports equipment like soccer balls. In this detailed guide, we’ll explore a straightforward method to model a soccer ball in Blender. This tutorial is suitable for beginners and intermediate users who want to enhance their 3D modeling skills.
Preparing Your Workspace
Before diving into the modeling process, it’s crucial to set up your Blender workspace efficiently. Blender’s default scene comes with a cube. Since we’re not starting our model from this cube, it’s necessary to delete it. To do this:
- Select the cube by clicking on it.
- Press
Xon your keyboard. - Confirm by clicking the ‘Delete’ button.
Adding the Base Object
The base object for our soccer ball will be an Ico Sphere:
- Click on ‘Add’ in the toolbar.
- Select ‘Mesh’ and then ‘Ico Sphere’.
This sphere will be transformed into our soccer ball. Initially, a small adjustment box appears at the bottom left of the screen.
Change the subdivision from two to one. This adjustment is crucial for the correct shape of the soccer ball.
Applying Modifiers
Adding a Bevel Modifier
The next step involves using a modifier to refine the object’s shape:
- Go to the Modifier tab.
- Choose ‘Bevel’.
Within the Bevel settings, select the ‘Only Vertices’ option. This ensures that the bevel effect is applied solely to the corners, giving a more accurate soccer ball shape.
Change the offset value to 0.35 to further refine the shape. Once satisfied with the bevel, click the ‘Apply’ button. Note that this makes the modifier permanent, and it can’t be edited later.
Adding Materials
Creating Black and White Materials
The classic soccer ball design features black pentagons and white hexagons:
- Go to the Materials tab.
- Click ‘New’ to create a white material. Set the base color to white.
- Create a second material, set its base color to black.
Editing Mode and Assigning Materials
Selecting and Assigning to Pentagons
- Enter Edit mode by pressing ‘Tab’ or clicking the ‘Object’ option.
- Activate the face selection mode by pressing ‘3’.
- Select a pentagon. If it’s not visible, ensure the overlay is turned on.
- Use ‘Select Similar’ > ‘Polygon Sides’ to automatically select other pentagons.
- Assign the black material to these faces.
Applying to Hexagons
Repeat the process for the hexagons, assigning the white material to them.
Extruding Faces for Realism
Creating Embossing at Seam Points
- Select all faces by pressing ‘A’.
- Use ‘Extrude Individual’ to extrude each face slightly (around -0.04). This step mimics the embossing seen on real soccer balls.
Adjusting Crease Values
Change the crease value to 1 to soften the edges, giving a more realistic look to the ball.
Adding Final Touches
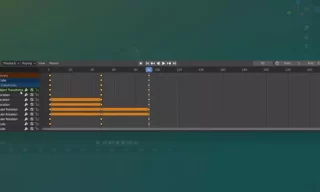
Subdivision Surface Modifier
- In the Modifier tab, add a ‘Subdivision Surface’ modifier.
- Set the type to ‘Simple’ to avoid distortions.
- Adjust the subdivision values for both render and viewport to 3.
Add a ‘Cast’ modifier under ‘Deform’ to slightly soften and ovalize the edges. Adjust the factor value to around 0.9 for a smoother appearance. Right-click on the object and select ‘Shade Smooth’ to eliminate any sharp edges or square areas.
Customizing Your Soccer Ball
Experiment with different factor values and extrusion levels to customize your soccer ball’s appearance. Values like 0.95 or 0.8 can significantly alter the look of your model.
Conclusion
Congratulations! You’ve successfully modeled a soccer ball in Blender. This tutorial not only teaches you how to create a specific sports equipment but also familiarizes you with essential Blender tools and techniques that can be applied to a wide range of 3D modeling projects.