How to Create a Typewriter Effect in After Effects: Step-by-Step Tutorial
Today, I’ll demonstrate how to create a typewriter effect in After Effects utilizing its Animate feature. This effect is a fantastic way to add a retro or stylistic touch to your text animations, making your content stand out.
Setting Up Your Composition
First, create a new composition with dimensions of 1920 by 1080, which is a standard HD resolution. Choose a 30-second duration for your composition, as this is a typical length for most animations. Click the ‘OK’ button, and a black screen appears, serving as your canvas.
Working with Text
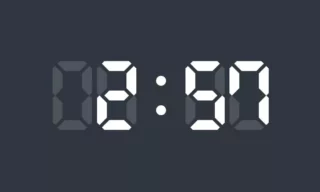
Access the text tool from the toolbox located above in the interface. For this tutorial, we’ll use the DS Digital font, a choice that provides a digital, yet classic typewriter look. You can easily download and install this font using the provided link below.
When you write text in After Effects, the anchor point defaults to the bottom left. For more refined animation control, it’s essential to move the anchor point to the center of the text. Use the ‘Ctrl Alt Home’ key combination for this adjustment.
Next, ensure your text is perfectly centered. Align the text both horizontally and vertically using the Align panel. If the Align panel isn’t visible, you can find it under the ‘Window’ menu.
Adding the Typewriter Effect
Click the arrow icon next to the text layer to reveal additional settings. Here, select the animate option and choose ‘Character Offset’, which opens up more features.
An option called ‘Animator 1’ appears. Click the triangle next to the ‘Add’ button and choose ‘Property’ followed by ‘Opacity’. The essence of the typewriter effect is making each character initially invisible, becoming visible as the timeline progresses. Set the opacity to zero to make all characters initially invisible.
Animating the Effect
Open the range selector feature and set a keyframe to animate the characters from zero to 100 opacity. Click the stopwatch icon next to the start value, creating a keyframe. Move the timeline to the 5th second and change the start value to 100.
When you play the animation, you might notice the text appears smoothly, which is not ideal for a typewriter effect. To correct this, go to the advanced settings and set the smoothness value to 0. This adjustment removes the smooth transition, making the text appear all at once.
Enhancing the Effect
Speed Adjustments
If the animation feels slow, adjust the keyframes to speed it up. This gives you the crisp, immediate effect of a typewriter.
Adding Realism with Sound
For an added touch of realism, consider adding a typewriter sound effect. This brings the animation to life and enhances the viewer’s experience.
Conclusion
In this tutorial, I’ve shown you how to create a typewriter effect using After Effects’ Animate feature. It’s a simple yet effective way to add character to your text presentations.