How To Make A Count Animation With Blender
In this blog post, we will dive into the fascinating world of creating count animations with Blender, even if you’re just starting out. This technique has a wide array of applications, from digital clocks and three-dimensional comparison videos to timers, countdowns, and count forwards. The beauty of Blender is that it opens up endless possibilities for creativity, allowing you to bring your digital projects to life in a way that’s both visually appealing and functionally robust.
How To Make A Count Animation With Blender
Creating animations in Blender, especially those that involve counting, can be an intriguing process. This tutorial will guide you through the steps to create a basic count animation, which can be a building block for more complex projects.
Count animations can be used in a variety of contexts. Whether you’re creating a digital clock, a timer for a sporting event, or visualizing data in a three-dimensional comparison video, understanding how to create these animations can enhance the quality and interactivity of your projects.
When you start a new project in Blender, you’ll begin with the default cube. This cube, while a simple object, marks the starting point of many Blender projects. However, for this tutorial, our focus will shift from the cube to a more powerful feature of Blender: the geometry nodes.
Geometry nodes in Blender provide a node-based interface for creating complex shapes and animations. This interface allows for a high degree of customization and can be incredibly powerful once you understand how to use it.
Blender’s interface is highly customizable, allowing you to view multiple windows simultaneously. To open the geometry nodes editor, you’ll need to split the window. This can be done by right-clicking on the window’s dividing line and selecting “horizontal split.” This action will give you two separate workspaces, enabling you to work with the three-dimensional view in one and the geometry nodes in another.
Once the window is split, you can open the geometry nodes editor by clicking on the arrow in the corner of the new window and selecting “geometry node editor” from the drop-down menu.
Geometry Nodes
With the geometry nodes editor open, select your object and click on the “new” button to start adding nodes. You’ll see an input and an output option, representing the beginning and end points of your node chain. The first step is to remove unnecessary nodes, which can be done by selecting them and pressing the delete button on your keyboard.

To create a count animation, you’ll need to add specific nodes. Under the add menu, navigate to “Utility” under “Text” and select “String to Curves.” This node will convert your numerical value into a text string that can be visualized in your animation. Next, add a “Value to String” node to convert the numerical value into a string that can be processed by the “String to Curves” node.
Once the necessary nodes are added, connect the “Value” node to the “Value to String” node, and then connect this to the “String to Curves” node. Finally, connect the “Curve Instances” option to the “Geometry” node to visualize the count in your scene.

By default, the numbers may appear horizontally. To adjust their orientation, simply rotate them 90 degrees on the x-axis to have them displayed vertically.
You can change the numerical value displayed in the animation by adjusting the “Value” node. This will directly affect the text displayed in the 3D view, allowing you to create a dynamic count animation.
Fine-Tuning The Animation
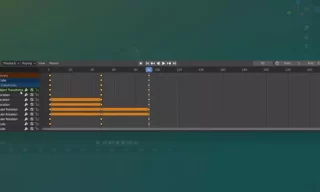
To animate the count, add keyframes to the “Value” node at the start and end points of your timeline. This will create an animation that counts from one number to another over a specified duration.
One common issue with animations is that they may start and end slowly, with a speed increase in the middle. This is due to Blender’s default Bezier interpolation between keyframes. To achieve a more consistent speed throughout the animation, switch to linear interpolation using the graph editor. This adjustment ensures that the count increases uniformly, providing a smooth and consistent animation.
Conclusion
In conclusion, this tutorial has guided you through the process of creating a basic count animation in Blender. By understanding how to use geometry nodes and manipulate keyframes, you can start incorporating count animations into your projects, adding a dynamic and interactive element that enhances the overall experience.