Grass Effect Mastery in Blender: Transform Your 3D Landscapes
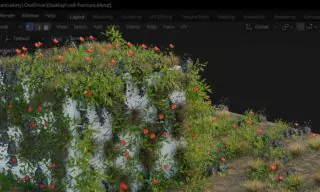
Creating realistic grass in Blender can significantly enhance the visual appeal of your 3D scenes. This guide will take you through the process of adding a grass effect to objects in Blender, using its powerful particle system and material settings. Whether you’re a beginner or an intermediate user, these steps will help you achieve a natural-looking grass texture.
- Placing the Object and Creating a Mesh Plane
- Utilizing Blender’s Particle Feature
- Adjusting Hair Density
- Setting the Hair Length
Placing the Object and Creating a Mesh Plane
Firstly, you need to place the object you want to apply the grass effect to, in the scene. Let’s start with a basic Mesh Plane. In Blender, you can do this by clicking the add button in the top left menu, and selecting Mesh > Plane. You might want to enlarge this plane slightly for a better view of the effect.
Utilizing Blender’s Particle Feature
Blender’s particle system is key to creating the grass effect. Access this feature by clicking the particle button. You’ll see options for different particle types. For grass, we’ll use the ‘Hair’ type, not the ‘Emitter’. Upon selecting ‘Hair’, you’ll notice hair-like strands emerging from the plane. This is the foundation of our grass effect.
Adjusting Hair Density
To achieve a dense grass look, you need to increase the number of hair strands. The default number is usually set at 1000, but for a fuller grass effect, you can increase this to around 40,000 or even 50,000. Remember, the higher the number, the denser the grass.
Setting the Hair Length
The default hair length might be too long for a realistic grass effect. You can find the length setting in the same particle settings panel. Adjusting this to a smaller value, like 0.2 meters, will give a more realistic grass height. The length you choose should correspond to the scale of your scene and the type of grass you’re aiming to replicate.
Incorporating Physics for Realism
Grass in the natural world isn’t perfectly uniform. To replicate this, you need to introduce some randomness. This is where the Brownian motion property under the ‘Physics’ section comes in handy.
Named after botanist Robert Brown, this setting introduces a natural, random movement to the strands, mimicking real grass. A setting around 0.1 often strikes a good balance between order and chaos, providing a realistic appearance.
Adding Material for Color
No grass is complete without the right color. Navigate to the material tab in Blender and add a new material to your grass object. Change the base color to a shade of green that resembles grass. Note that in ‘Solid’ mode, the color might not be visible immediately. Switch to ‘Render Preview’ mode to see the color effects in real-time.
Applying Grass Effect to Different Objects
Once you’ve mastered applying grass to a plane, you can try it on other objects. Blender’s ‘Suzanne’ (monkey) object is a good candidate for experimentation. Apply the same particle and material settings to this object to see how grass looks on a more complex surface.
Adjusting Density and Render Settings
For even more realism, you might need to increase the grass density. Sometimes, a value higher than 40,000, say 60,000, can create a lush, dense grass texture. To enhance the visual quality, switch to Blender’s ‘Cycles’ render engine and adjust lighting to suit your scene. This can significantly improve the final image’s realism.
Conclusion
Creating a grass effect in Blender is a simple yet powerful way to add realism to your 3D scenes. By adjusting particle settings, playing with physics properties, and choosing the right material, you can achieve a natural-looking grass texture.
