Typographic Portrait in Photoshop: From Text to Art
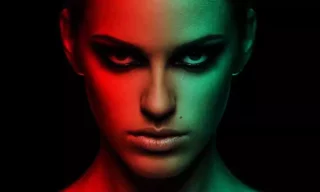
In this tutorial, we’ll delve into the fascinating process of creating a typographic portrait using Photoshop. This art form involves overlaying text onto a portrait photo, resulting in a visually striking image that combines photography and typography. The key requirement for this project is a portrait photo, and the rest of the magic happens in Photoshop.
Cut Out the Image
The first step in our journey is to isolate the portrait from its background. This can be done using various tools in Photoshop, such as the lasso or pen tool. However, for efficiency, I recommend using Photoshop’s Quick Selection tool.
Simply select the tool, click on ‘Select Subject’, and then use the ‘Select and Mask’ feature to refine the cutout. Once satisfied, apply a Layer Mask to separate the portrait from its background. Then, fill the background with black, preparing our image for the next steps.
Convert Image to Black and White
To enhance the effect of the typographic overlay, it’s advisable to convert the portrait to black and white. This can be easily done by clicking the Adjustment button in Photoshop and selecting the Black and White option. This creates a new layer that desaturates the colors in the photo, setting a perfect stage for our text.
Adding and Editing Text in the Workspace
Now, it’s time to add text to our workspace. Any text will do, even Lorem Ipsum. Use the text tool to draw a text box and paste your chosen text. To fine-tune the appearance of the text, open the Character panel (if it’s not visible, you can find it under the ‘Window’ menu).
Here, you can adjust font size, line spacing, and choose a different font if desired. Once you’re happy with the text, drag the text layer beneath the portrait layer. Right-click on the portrait layer and select ‘Create Clipping Mask’ to bind the text to the shape of the portrait.
Fine-Tuning the Text Overlay
The appearance of the portrait can be significantly altered by adjusting the font thickness and size. A thicker font makes the photo less visible, while a thinner font does the opposite.
Similarly, reducing the font size makes the portrait more prominent, and vice versa. Adjust line spacing as needed for aesthetic balance. I suggest setting the font size to 24 and line spacing to around 20 for a start.
Photoshop’s Displacement Map Feature
An advanced technique to enhance the typographic portrait is using Photoshop’s Displacement Map feature. This tool allows the text to adapt to the contours of the photo, giving a more realistic and integrated look.
To use this feature, make a blurred copy of your portrait layer, save it as a PSD file (e.g., ‘displacement.psd’), and then apply the Displace filter to the text layer, selecting the saved PSD file. This makes the text conform to the photo’s curves, adding depth and realism.
Editing Text in a Smart Object
If you need to modify the text, convert the text layer into a Smart Object. This allows you to revisit and edit the applied effects, such as the displacement settings. You can experiment with different settings to see how they affect the integration of text and image.
For the finishing touch, you might want to revert the photo to color or soften any harsh edges using a brush on the mask layer. Remember, the quality of the original photo significantly influences the final result. Adjust the black and white layer and the mask as per your preference to achieve the desired look.
Conclusion
This tutorial walked you through the steps to create a captivating typographic portrait in Photoshop. We explored cutting out the image, converting it to black and white, adding and editing text, and using advanced features like the Displacement Map. The key to success is experimentation and adjustment according to your artistic vision.