Easy Glitch Effect in Adobe Photoshop
In today’s digital world, the glitch effect has become a popular artistic style, often seen in both photos and videos. This effect mimics the look of a digital error or corruption, creating a unique aesthetic. In this tutorial, I’ll guide you through the process of applying a glitch effect to both an image and text within Photoshop. This technique can add a creative twist to your designs and is relatively simple to execute.
The glitch effect is essentially a distortion effect. It appears as if the digital data of an image or text has been corrupted, resulting in visual anomalies. This effect can be applied to create artistic and eye-catching designs, and it’s particularly popular in modern graphic design and digital art.
Preparing for the Glitch Effect
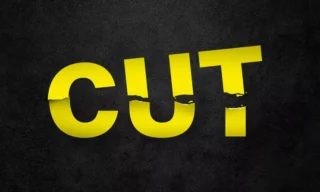
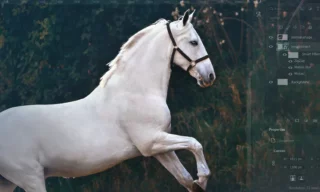
To begin, you’ll need to open your desired image in Photoshop. For this tutorial, I’ve also added text to the image to demonstrate how to apply the glitch effect to both elements simultaneously.
Start by duplicating your image. This can be done by pressing Ctrl + J (or Command + J on Mac). Right-click on the duplicated layer and select ‘Blending Options’. You’ll see a window with various options.
Under the ‘Blending Options’ tab, locate the ‘Channels’ field. This section might be unfamiliar if you’ve never adjusted channel settings before. You’ll see three values here: Red, Green, and Blue.
Applying the Glitch Effect
To create the glitch effect, we’ll begin by modifying these channel settings.
Uncheck the Green and Blue channels, leaving only the Red channel active. Click ‘OK’ to apply these changes. At this point, the top image will only display red hues, while the bottom layer (the original photo) will still have all RGB channels active.
To create the glitch effect, slightly move the top image to the right. This action will start to create the desired distortion. The extent of the movement depends on your artistic preference; there’s no fixed rule here.
Adding Distortion to Specific Areas
Now, let’s add more realistic distortion to certain parts of the image. Duplicate the original image once more and remember to keep the glitch effect layer at the top. You can rename this layer for better organization.
Select the Marquee Rectangle Tool and draw rectangles around the main subject of the image. Apply the same technique to the text if desired.
With the areas selected, click on the mask icon to apply a mask to these sections. Then, select the image layer to the left of the mask. Use the Move Tool to shift this part of the image slightly to the right.
Repeat the process for another duplicated layer of the main image, this time shifting selected areas to the left. This further enhances the distortion effect.
Finalizing the Glitch Effect
The steps outlined above form the basic logic of creating a glitch effect. You can adjust the intensity of the effect based on your specific image or text. Once satisfied with the effect, save your work in either JPEG or PNG format, depending on your needs.
Conclusion
In conclusion, mastering the glitch effect in Adobe Photoshop opens up a world of creative possibilities. This tutorial has guided you through the nuances of applying this trendy and artistic effect to your photos and text. With practice and exploration, you can transform ordinary images into stunning pieces of digital art.