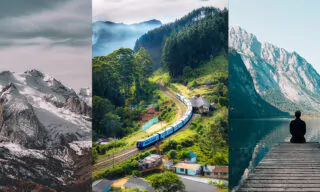
Transform Your Images with Water Reflection Effects in Photoshop
Mastering of creating water reflections in Photoshop stands as a hallmark of creative expression and technical proficiency. The process of adding a reflection effect, particularly one that mimics the fluid, dynamic nature of water, can transform an ordinary image into an extraordinary visual narrative.
By the end of this exploration, the once daunting task of integrating a water reflection effect into your photographs will become an exciting and achievable endeavor. With the magic of Photoshop at your fingertips, the potential to imbue your images with a new layer of depth and realism is limitless.
In today’s Photoshop tutorial, I’ll dive into creating mesmerizing water effects and reflections on your photos. This technique breathes life into images, adding a layer of realism and artistic flair.
We start by opening an image and converting its layer into a smart object for more flexibility in editing. This step is crucial as it allows non-destructive editing, which is a cornerstone in professional Photoshop work.
- Next, we double the canvas size to make room for the reflection. This is done by adjusting the canvas size to 200% of the original photo’s height, creating an equal amount of space at the bottom. The duplicate layer of the image is then transformed and flipped vertically to serve as the reflection. This transformation is a simple yet effective way to begin crafting the illusion of water.
- The real magic happens with the Motion Blur and Wave filters. Setting the Motion Blur angle to 90 degrees gives a vertical blur, mimicking the subtle movement of water. For the Wave effect, we manipulate several parameters: Number of Generators, wave length, and vertical scale. These settings will vary depending on the specific photo and the desired water effect. The goal is to create a realistic wave pattern without overdoing it.
- A critical aspect of this technique is blending the reflection seamlessly with the original image. We do this by creating a gradient mask on the reflection layer, gradually fading the waves to create a sense of depth. This gradient mask is a powerful tool in Photoshop, allowing for smooth transitions and nuanced blending of layers.
- But reflections in water aren’t just about shape and movement; color plays a significant role too. We use the Channel Mixer adjustment layer to modify the reflection’s color, giving it a distinct water-like hue. This adjustment can be fine-tuned to match the specific environmental conditions of the photo, such as time of day or water clarity.
- Lastly, we address any gaps caused by the transformation and blur effects. This is done by stretching the reflection layers to fill the entire canvas, ensuring a cohesive and complete image. This step emphasizes the importance of attention to detail in photo editing.
Conclusion
Throughout this tutorial, we’ve seen how Photoshop’s smart objects, filters, and adjustment layers can be combined to create stunning visual effects.
Remember, the beauty of Photoshop lies in experimentation. Don’t hesitate to tweak settings, try different filters, and play with colors.


