Creating Perfect Audio Spectrum Effect in After Effects

TR

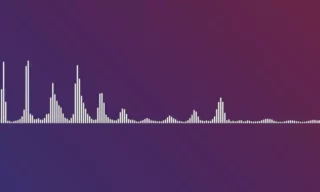
I’m going to show you a new alternative method with audio spectrum effects. Where we can visualize music. We will continue with triangle like shapes with audio spectrum effect and the background that supports this visualization. First, we add our music to the scene. I got this music from YouTube’s sound library.

Preparing Workspace for Audio Spectrum

Then let’s create a new composition. As we always do I create a 30 second composition with the black background, 1920 to 1080px. Then I drag the sound file I just added into the sequence. I press the letter L from the keyboard. So we turn on the sound wave feature. When I click on the arrow of this, we will see the sound waves. It’s music with these tones when we listen to the preview. Now we’ll create a new solid layer. Because we will analyze these audio spectrum effect that we will create over the solid. Therefore, I right click on the sequence, choose New and choose Solid. By clicking the Make Comp Size button we can make it exactly the size of the sequence we just created. I name it Audio Spectrum and click the OK button.

Triangle Shape for Audio Spectrum Effect

Now you can make this audio spectrum effect on various shapes. I’m going to show you now how it can be done with a triangle. However, we cannot draw a triangle directly. We will do this indirectly. I get a rectangle tool. I’m starting to draw a rectangle. If you press the shift key on the keyboard, you will draw a full square.

When we delete one of the points, we will get a triangle. I click on the Pen Tool and select the Delete Vertex Tool. Now I click on the dot in the last lower corner of this rectangle we have drawn. It doesn’t matter which one through. When I click on it, it deletes the dot there. So this creates a triangle for us. Because we want to make this exactly a downward facing triangle, I choose the selection tool. The shortcut is the letter V and I double click on the dots. When I click twice, it will highlight all the points. And when I rotate the keyboard by pressing the shift key, I will have a triangle pointing straight down. I press the Enter key on the. keyboard. I choose the point on the left first. Then I select the point on the right by pressing the Shift key. Thus, both points will be selected. When I move it upwards with the arrow keys, we will have a complete triangle form. We got a triangle. Let’s position, it. Using the Align panel, we can ensure that this is centered. If you do not have the align panel, you can access it with the Align option under the Window.

Associating Audio Spectrum

If you don’t have this, make sure the Effects option under the Window is checked. I’m typing Audio Spectrum here. When I write this, there is already one effect under the Generate folder. I’m putting this effect on the solid layer we just created, we won’t see anything. when we play right now. Because we haven’t integrated this audio spectrum effect into any music. In order to make this association, we need to change the audio layer option in the effects controls panel to the music file we added. When I select it and play it, you will see the sound waves here. This is the wave that you see in one line.

We want to impose this on the triangle. Therefore we select the path option here from None to Mask 1. The mask name automatically given the triangle we just created in Mask 1. When I select it and play it, we are associated with the triangle. As you can see by choosing this, we associate the triangle form with music. Now we can edit these values. I’ve changed the start frequency property to 1. By the way, if you don’t want to see the triangle here, you can click the Toggle Mask icon to turn off the appearance of the triangle. And we will only see the spectrum effect.

Basic Settings

We will also need to lower the End option a bit. Let’s get this down to 500 so we can see the sound waves well. The lower you lower it, the closer the sound waves it will become. It doesn’t need that much. So 500 is ideal. Let’s change the value of 64 to 100. Thus, we’ll see the lines between them a little more. We will have a more cramped appearance. If you want to change the thickness of these lines, you can change the thickness value. For example, when I do 1, we will get a much thinner look when I do 5 we will get a ticker look. Let’s leave it as 2 for now and set the softness value to 0 as well. We will be able to see the lines much more clearly.

Let’s make the colors whites. Later, we will have the opportunity to change these colors. And another option that is important here is the Side Options value. If you just choose A, it will give the spectrum effect from one side. That is, to the inner side. If you just choose B, it will give it to the outside. If you choose both A and B, it will have given both sides of this spectrum effect. You can customize this for yourself. Let’s set it to the side B right now. Now I shrink this audio spectrum effect and create a copy with Ctrl + D.

Now we will change this Display Options option. You are now seeing the digital part. Let’s change that to Analog Lines. When I change this, you’ll see that the other effect disappears. However, if you click on the Composite on Original option, we will see both the background image. The audio spectrum effect in the background and the line effect we just created. Let’s also activate the previous Composite on Original option. Thus, we will eliminate the overlapping problem. We are going to make them all appear.

This is the line we have created that is we can increase or decrease the thickness value of the line from here. Let’s change it to 1 right now. And now I’m closing it again. And as spectrum 3 I make a new copy with Ctrl + D and this time convert it from Analog Lines to Analog Dots. Let’s change the maximum height to 800 here and change the thickness value to 3 to see the points here better. 800 is too much. We can change it to 600, then let’s set it to be Side A. You can customize them according to you. You may not even want to use some of them. I’m showing these as an example. Now I want to apply a similar effect with the left side. So first we will add a mirror effect.

I’m dragging the mirror effect over the audio spectrum layer. Then I changed the value here to 180. When I change it to 180, it won’t show up because I need to center the center point. I click on the center point and set it to be right in the middle. Since we have a 1920 x 1080 pixels project, we can also solve the center point directly by entering a number. Here I’m typing 960 and typing 540. Thus, we have adjusted it so that it coincides with the middle. Now you can preview what we are doing by pressing the 0 key on the keyboard.

You can check the adjustments over and over again by playing with the values here momentarily. Now that we have done the mirror part, we can turn this part off. Alternatively, let’s add a stroke effect. I’m dragging this stroke effect. The stroke effect under Generate over the Mirror. Thus, we will see a border of this Mask that we have created. When I change the brush size to 1 we can get a nice effect or let’s change that to 2. Like I said, you have to add it in your way. Let’s also turn off the stroke effect. Now we can start working on the background. For this, I need to create a new background. I right click. New > Solid Layer with white background and click OK button.

Background Effects for Audio Spectrum

Now we will make this background with Star Burst effect. Therefore, I write Starburst in the effect section and drag the Starburst effect under the Simulation category onto the background. When I play the scene, you will see the dots coming towards you. To reverse this, I change the speed option to -1. So the dots will have gone forwards, I change the Grid Spacing can Size values to 20. This way, we will see an effect and let’s add a new effect. Let’s add the Radial Fast Blur effect. I’m putting this effect on the background layer and when I play it like that, let’s see what the result is.

Glow Effects for Audio Spectrum

We will reach the end of this animation when we add the glow effect. If the stars here seen too much, you can increase the Scatter value a little more. Like 300. You’ll get a much less starry look, we currently do not see the audio spectrum effect at the top of the triangle. In order to see this, I click on the audio spectrum layer, select the audio spectrum layer and press the letter M from the keyboard. When I press the letter M, we will see Mask 1. When I change the Add option next to it to None, You’ll see that the audio spectrum effect at the top is also visible. Now let’s add the glow effects. I typed glow in the search box. I drag the glow option under Stylize over the audio spectrum. First let’s change the Threshold value to 20%. We will try to create a wider glow effect by duplicating these layers as well. I copied this with Ctrl + D and change the radius value to 100. I also change the intensity value to 0.5, I’ve copied the glow effect again and change the radius to 300. Then I’m turning off the properties of the glow effects.

How to Change Spectrum Color

Now let’s add an adjustment layer to create a nice color. I right click, select New > Adjustment Layer. I changed its name to color by pressing the Enter key on the keyboard and I type curves in the search box in the effects panel. We can drag this effect onto the adjustment layer we created. You can create your own color by fiddling with the options here. For example, I click on the red and move the red line like this. If I click on the green and edit on the green, that way I can change the colors. I can also create other colors with blue. Since the colors are already made of RGB, you can create the color you want in this way.

A Small Setting for Dynamic Color

To make the colors look more dynamic I come to the Project Settings option under File. I’m changing the color option from 8 bits to 16 bits. You can make the colors more vivid by clicking the OK button. You can then move the timeline to the beginning and press 0 to get it rendered. Initially, while this preview render our audio file may have slow down. It’s getting preview rendering as it’s called. You will see and hear this more normally when you render.