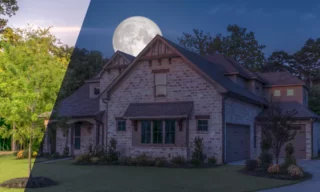
Using the Hue/Saturation Adjustment Layer in Photoshop
Our detailed guide on using the Hue/Saturation adjustment layer in Photoshop. This powerful tool allows you to change the color of specific areas in your image with precision, offering a plethora of creative possibilities.
Whether you’re a photographer looking to enhance your photos or a designer aiming to add a unique touch to your projects, mastering the Hue/Saturation tool is a skill that can significantly elevate your work.
What is Hue/Saturation?
Hue refers to the color itself, while saturation describes the intensity or purity of that color. In Photoshop, the Hue/Saturation adjustment layer is a non-destructive way of altering these two aspects, along with lightness, in your images.
Using the Hue/Saturation adjustment layer is beneficial because it allows for targeted color changes without affecting the overall photo. This tool is particularly useful for correcting color casts, enhancing specific tones, or creatively altering the color scheme of your image.
To start, open your image in Photoshop. Then, click on Layer > New Adjustment Layer > Hue/Saturation. This adds a new adjustment layer to your layers panel.
The Hue/Saturation panel consists of three main sliders:
- Hue: Shifts the colors.
- Saturation: Adjusts the intensity of colors.
- Lightness: Alters the brightness of colors.
Additionally, there’s an option to target specific colors through the dropdown menu, allowing you to adjust only a selected color range.
Selecting the Area for Color Change
Photoshop’s hand tool in the Hue/Saturation panel lets you click on a color in the image and directly adjust its hue, saturation, and lightness.
For more precision, create a mask on the Hue/Saturation layer. Use tools like the brush or lasso to define the area where the color change should apply.
Adjusting Hue and Saturation
Move the hue slider to change the color. Notice how the colors transition smoothly, offering you a wide range of hues.
Adjust the saturation slider to increase or decrease the color intensity. Be mindful of over-saturation, as it can lead to unnatural-looking results.
Fine-Tuning for Natural Effects
Use the lightness slider sparingly to maintain a natural look. Too much adjustment can lead to loss of detail.
If you’ve used a mask, feather the edges for a seamless blend between the adjusted and original areas.
Always toggle the visibility of the Hue/Saturation layer to compare your edits with the original image. This helps in achieving a balanced result.
Conclusion
Mastering the Hue/Saturation adjustment layer in Photoshop opens up a world of creative possibilities. By following these steps and practicing, you can enhance your images with professional, nuanced color adjustments.