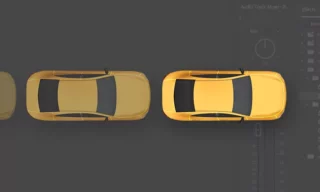
Rolling Any Type of Geometry in After Effects
Creating smooth, rolling animations for geometric shapes like triangles or squares in After Effects can be a challenging task, especially for beginners or even intermediate users. The process often involves extensive use of keyframes, which can be both time-consuming and, at times, not yield the desired level of satisfaction. In this blog, we will explore how to simplify this process using a pre-made rig, specifically designed to streamline the animation of rolling objects.
Understanding the Basics of Rolling Animations
Traditional methods of animating rolling objects in After Effects require a significant amount of keyframe manipulation. This can be tedious, as each keyframe must be manually adjusted to create the illusion of rolling. The result is often less than perfect, and the process can consume a considerable amount of time.
To overcome these challenges, we can use a pre-made rig. This approach allows for more efficient and effective animation, as the rig is specifically designed to handle the complexities of rolling motion.
Getting Started with the Pre-Made Rig
Downloading the Rig
The first step is to download the rig. For this tutorial, you can find the link here, directing you to a Dribbble page where the rig is hosted. Scroll down to the bottom of the page, and you will find a download area for the *.aep file.
Opening and Exploring the Rig
Once downloaded, open the file in After Effects. You will be greeted with a screen showing the rig, or the prepared file. As you move the timeline forward, you will notice that the triangle in the rig is already animated, indicating movement.
Editing and Customizing the Rig
Start by examining the layers in the scene. There’s a ground layer, which, despite not being physically interactive, adds a touch of realism to the animation.
In the Effect Controls panel, you’ll find various options to tweak your animation. If this panel isn’t visible, you can enable it via the Window menu.
By pressing ‘U’ on your keyboard, you can reveal active keyframes in the scene. The keyframes, particularly for rotation, are crucial for achieving the rolling effect. You can adjust these keyframes to change the speed and direction of the rotation.
To create a continuous loop, remove all existing keyframes and set new ones. For a triangle, set the rotation to 180 degrees initially and then adjust as needed to complete a full 360-degree rotation.
Changing Polygon Shapes
The rig allows for the adjustment of polygon shapes. You can switch from a triangle to a rectangle, pentagon, hexagon, or any shape with up to ten sides. This flexibility enables a wide range of creative possibilities.
The rig also simulates the interaction with the ground, enhancing the realism of the animation. You can adjust the size of the polygon to fit your project’s needs.
Practical Applications
- Using the Rig in Projects: This rig can be used in various types of projects, depending on your creative needs. For instance, you can rotate the ground layer to create different perspectives or precompose the sequence for additional effects.
- Duplicating and Modifying the Rig: To create multiple objects, simply duplicate the rig and adjust the size and number of sides as needed. This allows for the creation of complex scenes with multiple rolling objects.
- Changing Colors: Customize the color of your objects by selecting the Fill color option. This adds another layer of personalization to your animation.
Conclusion
This tutorial has covered the basics of using a pre-made rig in After Effects to create smooth, rolling animations. This method saves time and enhances the quality of your animations.