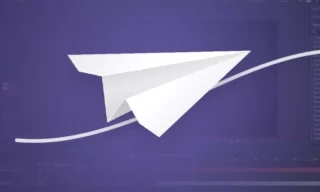
Animate Text Along Any Path in After Effects
In this detailed After Effects tutorial, I will guide you through the process of creating an engaging text animation, similar to what you see on screen. This method involves a specific pattern of animation and the use of masks to guide text progression.
To start, create a new composition and use the text tool to write your text; ‘Lorem Ipsum’ can be a placeholder. Remember, you can edit the text to fit your specific scene.
Integrating Text Animation
This technique allows for the integration of text animation on any desired shape. We’ll explore this by trying different shapes.
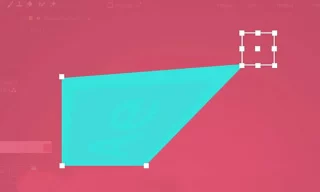
Using the Rectangle Tool
Begin by selecting the Rectangle Tool and drawing a shape on your scene. Don’t worry about the text visibility at this point.
In the Text section on the left side of the interface, click the Path Options icon. Here, you will see a ‘Path’ option set to ‘None’ by default. Clicking on this reveals the names of Masks in the scene. For now, it will show only one Mask, as that’s all we have.
The default setting places text inside the drawn area. To move the text outside the Mask, set the ‘Reverse Path’ from Off to On. You can further manipulate the text using the character panel.
Animating the Text
For animation, we use the ‘First Margin’ feature. Adjusting this alters the text position. To animate, keyframe this property. Let’s see an example:
Set the value to 0 and create a Keyframe. Move the timeline forward and increase the value to see the animation in action. Adjust the Keyframe position for speed control.
Activating the Motion Blur feature adds a natural look to the moving text, especially noticeable in quick movements, like when the letter ‘M’ shifts sides.
Expanding the Technique
We can apply this method to different shapes for varied effects.
Switch to the Ellipse Tool and draw a circle while holding the Shift key. Select Mask 2 in the Path Options to see the text wrap around the circle. Adjust font size from the character panel for better fitting.
The Motion Blur effect can be toggled according to your project needs. It adds fluidity to the animation.
To make text follow a drawn line, use the Pen tool to create any shape. Select the newly drawn Mask in the Path Options. The text will now follow this path. Delete previous Masks for a cleaner scene.
Conclusion
This tutorial shows how to animate text around various shapes using After Effects. Remember to play around with the features like Motion Blur and font size to fit your project’s needs.