Top Keyboard Shortcuts for Adobe After Effects: A Must-Know List
I’m talking about keyboard shortcuts that you will want to press to use After Effects faster and more practically. Here are the most used shortcuts in the professional world.
I and O keys
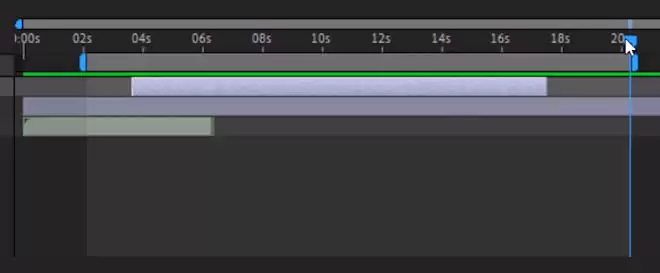
First of all, I want to talk about I and O keys on the keyboard. When you press I key, the timeline should go to the beginning, which is the word In. When you press O, it should go to the end, which is the word Out.
Render Area Shortcuts
It is also possible to intervene on the render area you see on the top. For this, for example, when the timeline is here, I press the letter B. This is the start line. If I press the letter N next to the letter B, the end line and the end of the render area is here.
Layer Properties Shortcuts
Above the layers, when you press the arrows on the left side and under transform, you will see 5 properties. These are the places to animate your object, to give it movement. Each one of them has shortcuts.
- The shortcut for anchor point is A, it immediately goes to the property where anchor point is.
- The letter P is position, you can think of the initials.
- S is scale, which is used to size the object.
- R is rotation, that is to rotate to object.
- And finally opacity with the initial letter T is used for transparency value.
How to Add Keyframe?
Now to key frame these properties, we need to press these letters using Shift and Alt keys together.
For example, to key frame the scale value, I press Shift + Alt + S. If I go forward in the same way and press Shift + Alt + S again, it creates a second key frame. Of course, it doesn’t do this to the one below. I press Shift + Alt + S to make it to it to the one below.
When you press Shift + Alt + P for position, when you press R for rotation, when you press T for transparency value, and when you press Shift + Alt with the letter A, it gives anchor point key frames.
Just Show Me the Keyframed Properties
When layers with key frames are selected and you press U on the keyboard, only the key framed properties of the selected layer are visible. Here I press the letter U, and only the scale values activated because we just key framed only the scale value.
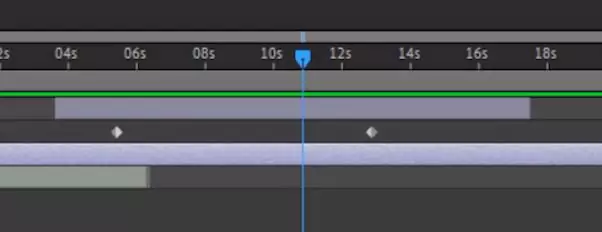
When I press U again, it turns it off again, I select the bottom layer and press U. As you can see, since these are all the key frames we have just given, it’ll show them all at the same time. If you have used an effect on the layer and you want to display only the effect, I press the letter E while the layer is selected.
Effects and Masks Shortcut
When I press the letter E, only the given effects will appear.
If you have given a mask to an object, you can make the mask appear by pressing the letter M and the letter F, which is only used for the mask value is used to display the feather value of the mask.
In this way, it is possible to make changes to the feather.
Hide Selection Lines
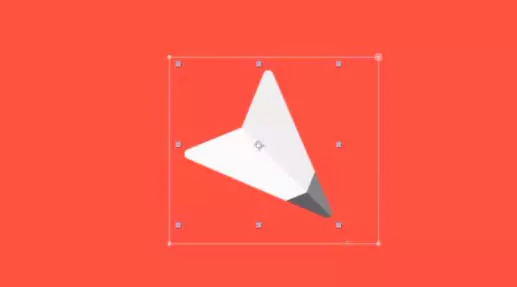
If you intend to view and edit some things on the monitor, but the squares and selection areas you see on the image bother you, you can make them disappear. By pressing Ctrl + Shift + H and make them visible by pressing the same keys again.
Monitor Shortcuts
When you press Ctrl – and Ctrl + on the screen, the selected object, the active object, shrinks and grows.
If you press minus and plus without pressing Ctrl, you will rotate the objects. If you press Alt on the keyboard and move the wheel on your mouse back and forward that means zoom in and zoom out.
Video Preview Quality Shortcut
You may need to use half instead of full when you are previewing, there’s a shortcut for that too. If you want to make the quality here full, we use Ctrl + J. If you want to make it half, we use Ctrl + Shift + J.
Zoom In and Out and Oan onTimeline
Thus, you can make quick transitions on the keyboard, without using the mouse. In the same way when you play with the wheel by pressing Alt on the timeline, you can zoom in and zoom out at the point where your mouse cursor is.
If you want to move left and right when you zoom in, you need to press Shift and move the wheel of your mouse. When you move the wheel downwards, the timeline will move to the right, and when you move it upwards, it’ll move to the left.
How to Cut with Shortcut in After Effects
If you want to split the selected object in half and make it into two layers, we use Ctrl + Shift + D.
Show Sound Waves
It turns a single layer into two layers and cuts it where the timeline is. If you are working with music and you are working with an effect in the background and you want to see the sound waves of the music of these sound files, click on the music, you want to see the sound wave, so select the music and press the letter L twice on the keyboard.
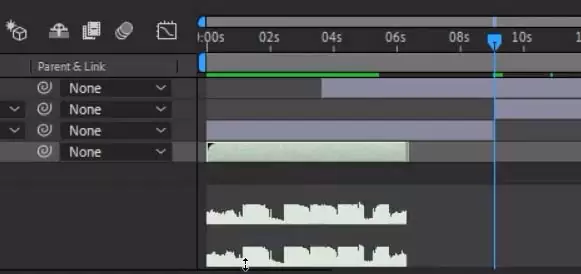
Then these sound waves will appear. If you press it again, they will be hidden.
Composition Settings Shortcut
Ctrl + K to go into your composition settings. This will bring you to Composition Settings where you can make any adjustments you want.
Precompose
If I want to shortcut the process of combining multiple layers into a single layer and making it into a separate composition, which in Photoshop is a smart object and in Premiere is a nest, which here means precompose, I press Ctrl + Shift + C after selecting the layers.
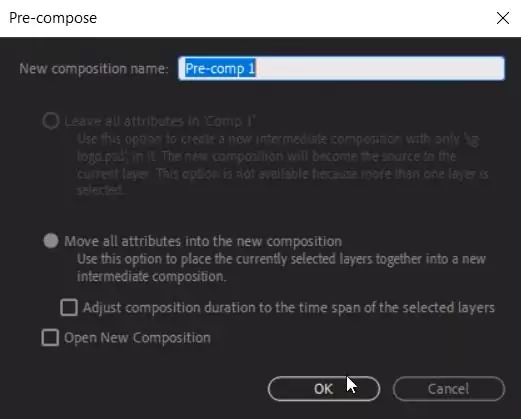
This combination opens the precompose window. When I enter a new name and click Okay, this becomes a single layer. When I go into it, I can see the layers I merged separately.
Create New Solid Layer Shortcut
To create a new solid layer, I use Ctrl + Y. The window for creating a new solid layer, here I set the color of the solid layer, and when I click okay, it is automatically created here. If you need to output to animation you made, you need to render it.
Export Your Project
If you want to save it to your computer in mp4 or other formats, for this, I use the Ctrl + M combination, which takes me to the render window.
If you prefer the render in Media Encoder, or if you have more than one scene and you want to cue them, you can use Ctrl + Alt + M. This will render the current scene, thus the render of the existing scene comes in front of you to be rendered through Media Encoder. These are the shortcuts I want to talk about in After Effect.


