How to Place Objects on Textured Surfaces in Photoshop
Photoshop is an incredibly powerful tool for graphic designers, photographers, and hobbyists alike. One common challenge, however, is making text or logos look like they’re naturally part of a photographed scene. In this guide, we’ll delve into advanced techniques to blend text and logos seamlessly into various backgrounds using Photoshop’s blend features.
Understanding the Basics of Text and Logo Integration
Before jumping into complex methods, it’s crucial to understand why text often looks out of place in a photo. The primary reason is the lack of integration with the unique textures and lighting of the background. Simply adding text or a logo onto a surface like a wall, fabric, or wood without any adjustments will make it appear artificially superimposed.
Common Mistakes to Avoid
- Overlooking Texture and Lighting: Text must reflect the characteristics of the surface it’s on.
- Ignoring Perspective and Scale: Text size and angle should match the scene’s perspective.
Step-by-Step Guide to Realistic Text Integration
Choosing the Right Backgrounds
- Wall Image: Ideal for demonstrating paint-like effects.
- Denim Fabric: Great for showing how text can mimic embroidery or printing on fabric.
- Wood Surface: Useful for understanding how text interacts with grainy textures.
Adding Your Text or Logo
- Ensure your text or logo layer is a smart object for non-destructive edits.
- Position and scale the layer appropriately to match the background scene.
Using Blending Options for Realism
- Access blending options by right-clicking the layer.
- Focus on the ‘Underlying Layer’ option in the Blending Options tab.
- Adjust the black slider to blend the layer with darker parts of the background.
- Hold ‘Alt’ and split the triangle slider for more precise control.
- Adjust until the text appears naturally part of the background.
Color Adjustments and Effects
- Use ‘Color Overlay’ in layer styles to change text color.
- Apply ‘Gaussian Blur’ for a softer, more integrated look.
Advanced Techniques
- Layer Styles: Experiment with ‘Darken’, ‘Multiply’, or ‘Overlay’ for different effects.
- Opacity Adjustments: Sometimes, reducing opacity slightly can enhance realism.
- Consider the environmental factors like shadows and highlights.
- Use layer masks to subtly remove or fade parts of the text where necessary.
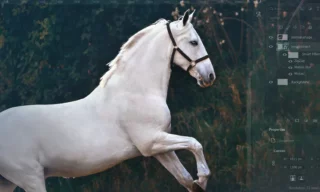
Photoshop Logo on Different Backgrounds
- On a Wall: Achieve a painted-on look using blending options.
- On Denim: Create an embroidered effect with color adjustments and blending.
- On Wood: Understand how texture plays a key role in blending.
Tips for Specific Scenarios
- For Rough Surfaces: Increase blending with the surface texture.
- For Soft Fabrics: Use softer, more diffuse blending techniques.
Conclusion
Integrating text and logos into photos realistically requires a keen eye for detail and a good understanding of Photoshop’s blending tools. By following these steps and tips, you can achieve highly realistic results that make your text look like it was always part of the original photo.