Blvck Paris Photo Editing: The Ultimate Guide to Getting the Look
In this detailed guide, we’ll explore how to achieve the unique Blvck Paris photo effect using Adobe Lightroom, a popular photo editing software. Blvck Paris is known for its distinctive style that heavily features black tones while accentuating yellow hues. Their Instagram account showcases this unique aesthetic. Whether you’re using Lightroom on your desktop or mobile, these techniques can be applied to create a similar look.
What is Blvck Paris?
Blvck Paris is a style channel that focuses on photos with a deep black color scheme, highlighting yellow tones. This creates a striking visual contrast and a signature look. To understand their style better, check their Instagram account for inspiration.
Achieving the Blvck Paris look requires skillful photo editing. Lightroom offers a wide range of tools to manipulate colors, tones, and contrast to create this effect.
Step-by-Step Guide to Editing in Lightroom
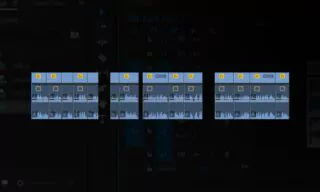
Getting Started in Lightroom
- Start by opening Adobe Lightroom on your desktop or mobile device.
- Navigate to the ‘Develop’ tab at the top of the interface to access the main editing tools.
Basic Adjustments
- Since every photo is unique, adjust the brightness and contrast based on your image’s needs. Begin by slightly reducing the contrast.
- Shift whites to the far left and open up the blacks a bit to reduce contrast further.
Clarity, Vibrance, and Saturation
- Increase the Clarity value to around +25 to add depth.
- Set both Vibrance and Saturation to between -25 and -30, which desaturates the colors and gives a muted effect.
Tone Curve Adjustments
- In the Tone Curve panel, ensure RGB is selected.
- Click a quarter way from the top and bottom of the line and adjust these points downwards slightly to balance highlights and shadows.
Saturation Tab Tweaks
- In the Saturation tab, emphasize red and orange tones by setting them to +20 or +10.
- In the Luminance tab, reduce the red and orange values to -10.
- In the Hue tab, set the orange slider to -10 to lean towards a reddish hue.
Achieving the Blue Tone
- Set the first value to 210 and the second to 220.
- Set the saturation levels to 5 and 10 respectively, adding a subtle blue tint to the image.
Finalizing the Look
- Optionally, increase the contrast and exposure slightly for a more striking effect.
- Use Ctrl + Alt + V (or Command + Option + V on Mac) to copy these settings to other photos in your library.
Creating a Cohesive Look
- Ensure all your photos have a consistent orientation and crop them if necessary.
- Use the survey mode to view all edited photos together, ensuring consistency in style.
Save these settings as a preset in Lightroom for future use, making your workflow more efficient.
Conclusion
In this comprehensive guide, we’ve journeyed through the intricacies of emulating the Blvck Paris photo effect using Adobe Lightroom. The process, involving careful adjustments of contrast, clarity, saturation, and tones, illustrates how subtle changes can significantly transform a photograph’s aesthetic.