Make Transparent Text In Photoshop
Creating a transparent text effect in Photoshop is a simple yet impactful way to enhance your digital designs. This technique allows text to adopt the underlying image’s visual elements, creating a seamless and integrated appearance. This guide will walk you through the process of achieving this effect.
Understanding the Basics of Transparent Text
What Is Transparent Text?
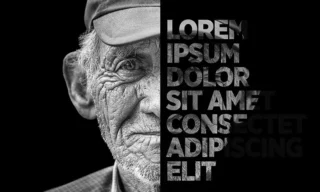
Transparent text is a Photoshop text effect where the text appears to be part of the background image. It’s created by overlaying text onto an image in such a way that the background image is visible through the letters. This effect adds depth and artistic flair to your designs.
Preparing the Image and Text
Opening the Image
- Open Photoshop and select the image you want to apply the transparent text effect to. This will be the base layer for your project.
Drawing the Shape
- Use the Shape Tools to draw a square on the image. Ideally, this should be positioned centrally to balance the composition.
- Adjust the square’s appearance, turning its color to white and rounding the corners. Rounded corners create a softer, more aesthetically pleasing look.
Centering the Shape
- Center the shape within the image using the Select and Align tools. Make sure to select both the image and the shape layer for accurate alignment.
Adding and Styling the Text
Writing the Text
- Select the Text Tool and type your desired text. In this example, we’ll use ‘Istanbul’.
- Enlarge the text so it fits within the white area, ensuring it aligns with the shape and the overall design.
Choosing the Font and Style
- Select a bold font like Helvetica for greater impact. Bold fonts tend to work better for transparent text effects due to their wider and more pronounced letterforms.
- Center the text both horizontally and vertically over the shape. Adjust font size and letter spacing to achieve the best visual balance.
Adjusting the Text Placement
- Fine-tune the text’s position to ensure there is equal space at the top and bottom of the square.
Creating the Transparent Effect
Clipping the Background Image
- Duplicate the background image layer and position it above the text layer.
- Right-click on the duplicated layer and choose ‘Create Clipping Mask’. This step ensures that the background image appears only within the boundaries of the text.
Linking Layers
- Link the text and the duplicated image layers. This ensures that any movement or transformation applied to one layer affects both, maintaining the cohesion of the transparent effect.
Final Touches and Color Adjustments
Changing the Background Color
- Experiment with different background colors. Double-click on the shape layer to open the color palette and choose a new color. Both dark and light colors can be effective, depending on the overall design and the background image.
Alternative Methods and Variations
- Explore alternative methods such as using different fonts, images, or text placements. Each variation can lead to a unique and captivating design.
Conclusion
This tutorial covers the basic steps for creating a transparent text effect in Photoshop. By following these steps, you can add an artistic and professional touch to your designs.