Adobe Premiere’s Match Color Feature: A Game-Changer for Filmmakers
Adobe Premiere Pro, a widely-used video editing software, offers a powerful feature known as color matching. This tool is essential for filmmakers, video editors, and content creators aiming to achieve a cinematic look in their projects. Color matching is the process of adjusting the colors in one piece of footage to match the colors of another.
This capability is especially useful in situations where different scenes or clips are shot under varying lighting conditions or with different cameras, potentially leading to inconsistencies in color and tone.
The Practicality of Color Matching
Why Use Color Matching?
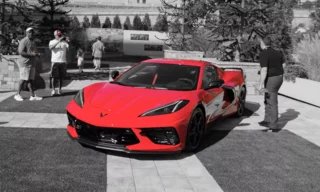
- Consistency Across Scenes: For instance, if you have footage shot during a sunset and another on a cloudy day, color matching helps unify these scenes, making them appear as if they were shot under the same conditions.
- Emulating Film Tones: Another interesting application is matching the color tones of famous movies. This can be particularly appealing for creators looking to mimic the aesthetic of a specific film or genre.
How to Use Color Matching in Adobe Premiere
Finding a Color Palette
- Searching for Palettes: Start by searching for ‘Movie Color Palettes’ or ‘Hollywood Movie Color Palette’ on Google Images. This search will yield a variety of color palettes used in different films.
- Downloading Palettes: Choose and download the palettes that resonate with your project.
Importing and Using Color Palettes
- Accessing Lumetri Color Panel: In Premiere, ensure the Lumetri Color panel is visible. If not, activate it by selecting the Lumetri Color option under the Window menu.
- Importing Videos: Bring your chosen videos into Premiere. For this demonstration, let’s assume we have three different videos.
- Creating an Adjustment Layer: Right-click in an empty area in your project panel, select New Item > Adjustment Layer, and confirm. This layer will be used for applying the color adjustments.
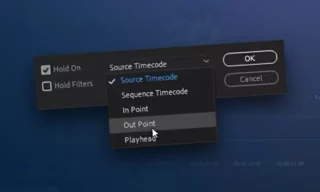
- Applying Color Palettes: Place your chosen color palette image in the timeline. Overlay the adjustment layer above the video clips. In the Lumetri Color panel, go to Color Wheels and Match. Use the Comparison View to see both the video and the color palette. Click ‘Apply Match’ to transfer the color tones from the palette to your video.
Practical Tips and Tricks
- Adjustment Layers: Using adjustment layers for color matching is beneficial as it allows you to apply color adjustments non-destructively and across multiple clips.
- Tweaking Results: While the initial color match might not be perfect, it provides a great starting point. You can further tweak the colors using other tools within the Lumetri Color panel.
- Experimentation: Try different color palettes to see how they affect the mood and tone of your footage.
Conclusion
Color matching in Adobe Premiere Pro is a powerful tool for video creators, enabling them to achieve a consistent, cinematic look. By using color palettes from famous films or creating your own, you can significantly enhance the visual appeal of your videos.