Face Censoring in Adobe Premiere: Mastering Mosaic and Blur Techniques
|
Adobe Premiere Pro offers a range of features for video editing, and one of its useful functions is the ability to blur objects within your footage. This tutorial will guide you through the steps to effectively blur or mosaic objects, such as a face or a license plate, in your videos using Adobe Premiere Pro.
Index
Understanding the Need for Blurring Objects
Reasons for Blurring
There are various scenarios where blurring objects in a video becomes necessary:
- Blurring faces or license plates to protect identities.
- Hiding brand logos or trademarks in your footage.
- Using blur effects for creative storytelling or visual appeal.
Step-by-Step Guide to Blurring Objects
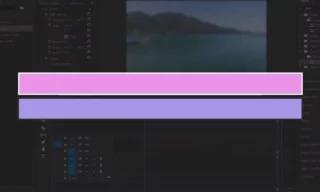
- Right-click in an empty space in your sequence, select ‘New Item’, then ‘Adjustment Layer’.
- Drag the adjustment layer over your video clip. Adjust it to align precisely with your footage.
Using the Effect Controls Panel
- Ensure the ‘Effect Controls’ panel is visible. If not, activate it under the ‘Window’ menu.
- Within this panel, concentrate on the ‘Opacity’ settings for the adjustment layer.
Selecting the Right Masking Tool
- Choose from a circle, rectangle, or the freehand pen tool, based on the shape of the object you’re blurring.
- For a round object like a bird’s head, the circular mask tool is ideal.
Adjusting and Tracking the Mask
- Drag the mask over the object (e.g., the bird’s head).
- Ensure the mask snugly fits the object.
- Use the tracking options to follow the object throughout the footage.
- If tracking fails, delete the keyframes and readjust.
Applying Blur or Mosaic Effects
- Search for ‘Gaussian Blur’ or ‘Mosaic’ in the effects panel.
- Drag the selected effect onto the adjustment layer.
- Modify the settings (like blurness or mosaic block size) to achieve the desired look.
Conclusion
Blurring or mosaicing objects in Adobe Premiere Pro is a straightforward process that enhances the professionalism and compliance of your video content. By following these steps, you can effectively obscure any object in your footage while maintaining the overall quality of your video.
Trending


Look at These!