Mastering Frame Freezing: A Game-Changer in Video Production
Video content is composed of numerous frames, typically measured in frames per second (FPS). Common frame rates include 24 FPS, often used in cinema, and 60 FPS, popular in gaming and high-definition video. Each frame is a still image, and when played in sequence at a rapid pace, they create the illusion of motion.
Modern video editing software, like Adobe Premiere, has simplified the process of freezing a frame. This technique is essential in video editing for emphasizing a particular moment or creating a pause effect in the video.
Freezing the First and Last Frame
Using Frame Hold Options: By right-clicking on the video in the timeline, you can access the Frame Hold Options. This feature provides several ways to freeze a frame, including at the beginning (Inpoint) and end (Outpoint) of the video.
- Freezing the First Frame (Inpoint): Selecting the Inpoint option freezes the first frame of the video, making it appear as a still image throughout the video’s duration.
- Freezing the Last Frame (Outpoint): Similarly, choosing the Outpoint option freezes the last frame, effectively pausing the video at its conclusion.
Freezing a Frame on the Timeline
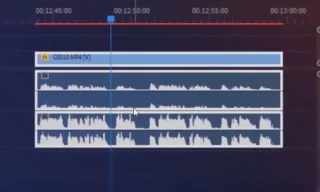
Playhead Option: The Playhead option in the Frame Hold settings allows you to freeze the frame where the timeline cursor is positioned. For instance, if you want to freeze a specific action, like a step in a dance sequence, simply place the playhead at that moment and apply the Frame Hold.
Freezing at a Specified Time Frame
Sequence Timecode: This option is useful for freezing a frame at a precise time, independent of the playhead’s current position. For example, to freeze the frame at the third second of a 5-second video, you would enter the specific timecode in the Frame Hold options.
Freeze After Selected Frame
Add Frame Hold: Another useful feature is the Add Frame Hold option, which freezes the video after a selected frame. This is different from the Inpoint and Outpoint options as it allows the video to play up to a certain point and then freeze.
Adjusting the Duration of the Freeze Frame
Insert Frame Hold Segment: This feature adds a freeze frame at a selected point and continues the video after a specified duration. It’s ideal for inserting a pause in the video without affecting the rest of the timeline.
Conclusion
Freeze frame techniques are pivotal in video editing, providing a way to highlight moments, create pauses, or emphasize specific frames. With modern software like Adobe Premiere, these processes have become more accessible and time-efficient. If you’re regularly using freeze frames in your projects, mastering these methods can significantly enhance your workflow.