Migrate Your WordPress Site to a Local Environment Using LocalWP and WP Migrate Lite
In today’s digital era, mastering the art of migrating WordPress sites to a local environment using LocalWP is essential for web developers and site administrators.
This process, known as “local environment migration,” leverages the power of LocalWP to ensure a seamless and efficient transition of your website’s data and settings.
By understanding how to effectively migrate your site with LocalWP, you not only enhance your development workflow but also ensure a higher degree of control and testing flexibility. This guide is tailored to provide you with the necessary insights and steps to accomplish this task with ease.
Getting Started with LocalWP
The first step in this process is to install LocalWP on your computer. LocalWP is an application that simplifies the management of local WordPress sites. If you’re unfamiliar with the installation process, there are numerous resources and tutorials available, including videos that can guide you step-by-step.

Setting Up Your Local Environment
Once LocalWP is installed, launch the application and click on the “Create a new site” button. This initiates the process of setting up your local WordPress environment, a crucial step for the subsequent migration.
Using WP Migrate Lite
Navigate to the “Add New Plugin” page in your WordPress administration panel and search for WP Migrate Lite. Install and activate the plugin, which will enable you to export your site’s content and settings easily.
On the WP Migrate Lite settings page, go to the Migrate tab. Here, you’ll need to configure the export settings to match your local environment.
This includes specifying the website address in LocalWP and selecting the folders you wish to export, such as WP Content, Media Uploads, Themes, and Plugins.
After configuring the settings, click the “Export” button to start the export process. The plugin will create a .zip file (e.g., ekinyalgin.zip) containing your site’s data. Save this file in a designated LocalWP folder on your desktop for easy access.
Importing to LocalWP
Open LocalWP and use the “Select existing zip” option to import the .zip file. Specify the site’s name and configure advanced options such as site path and domain. This step is crucial for ensuring that your local site mirrors the live site accurately.
In LocalWP, you can select your preferred PHP version, web server, and database. Once you finalize these settings, click on “Import site” to transfer the contents of the .zip file into your local environment. LocalWP will handle the file and database import, setting up your site as per the configurations.
Accessing Your Local Site
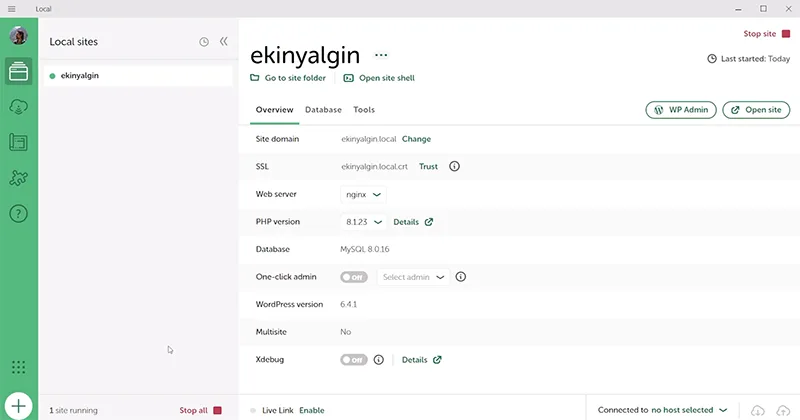
Once the import is complete, your site should be running locally. You can access it by entering the local domain (e.g., ekinyalgin.local) in your browser or clicking the “Open Site” button in LocalWP. Test the site to ensure all components, including images and media, are functioning as expected.
If you need to access or edit your site’s database, LocalWP offers an “Open Adminer” link under the database tab. Adminer is a tool similar to PhpMyAdmin, providing a user-friendly interface for database management.
Conclusion
By following these steps, you can effortlessly migrate your live WordPress site to a LocalWP environment. This process eliminates the need for complex configurations like editing the wp-config.php file or updating URLs manually.
It’s an effective solution for theme developers, content creators, and web developers seeking a secure way to test and develop their sites.


